One of the first things I ever wanted to do was add foliage to see what a tree could look like.
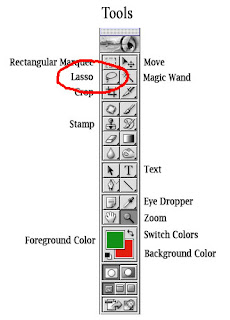
The easiest way to do this is copy foliage that already exists on the tree. ( I will go through at a later date how to put foliage on a 'nude' tree.) There are a number of ways to 'nick' foliage, the easiest is using the lasso tool.
 Actions:
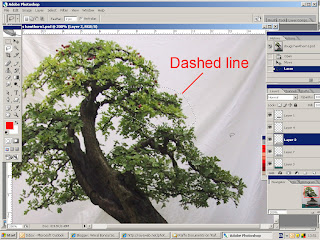
1. Click the lasso tool & draw around a section of existing foliage by holding down your left mouse button, making sure you complete a perimeter. When finished this will leave a dashed line around the area to be copied.
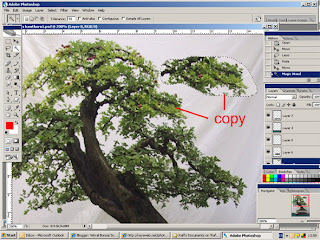
 2. Then you copy the area by either going to edit/copy (next to File on your top horizontal tool bar) or by pressing the Ctrl & C buttons at the same time. This stores a copy of the area 'in' the computor.
3. You then want to add this back onto the picture by using paste, now highlighted under copy as above or by pressing the Ctrl & V buttons.
4. This then adds the new bit of picture on a new layer (like laying a sheet of tracing paper over the original picture. What might be confusing at this point is that it puts the new bit of picture exactly over the old, so it might look like nothings happened!
5. By clicking the Move tool (above and to right of the lasso tool) you can then position the added foliage where you want.
5. By clicking the Move tool (above and to right of the lasso tool) you can then position the added foliage where you want.
 6. You can then work on this new foliage layer ie. move it to where you want-
or if you're up to it, use the rubber tool (below the stamp tool as per the picture above) to delete bits you don't want.
Then remember, save the picture with a new file name ie. Hawthorn A - then, if you have a c**k up you can always start again!!!


