After I added foliage to a tree the
next thing I wanted to do was to represent deadwood and explore its position and detail.
You can obviously only add the deadwood 'look' to something that's already on the tree you want to virtual so its best to start with a good photo with nice contrast between light and dark in the area to be worked on. I have tried it with some trees that the trunk is all dark shadow and to be honest it's not worth the effort!!
You can just 'paint on' a layer to produce the effect but the ways described below I think 'use' the contours already in the tree to best effect.
Actions:
1. Select the area to be lightened and produce a copy layer (see actions 1-4 in the adding foliage post.) I usually copy more than is required as you can always rub out the bits you don't want later!
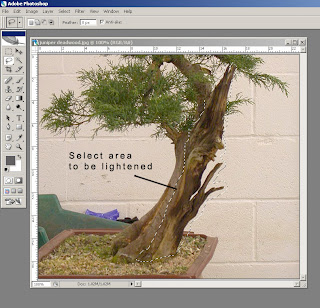
2. There are then two ways to produce the deadwood effect.
A1. With the copy layer selected go to
Image (top left) and then select
Adjustments then
brightness/contrast. -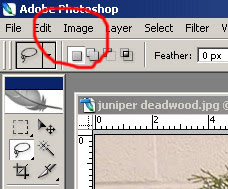 -
-A2. Then slide the brightness and contrast sliders until your happy with their effect.
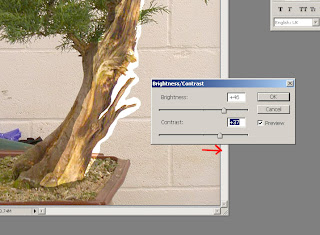
A3. Then delete the areas you don't want or like. (eg. the white areas around the trunk line etc.)
OR
B1. Select the dodge /burn tool. (click the corner arrow to see all options under this icon)

B2. Use the variable brush to make the copy layer lighter (Dodge) and/or darker (Burn) where you want it.
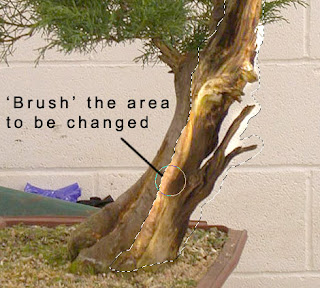
B3. Adjust or delete the areas not required.
NB. Remember to add a shadow on the edge of a deadwood area to replicate the live wood being proud of the virtual deadwood.
I find the second method better as it produces more subtle effects whereas the first method is quicker but gives a single overall change. With both methods, be careful not to overdo the brightness/contrast though as the effect can look unreal if you go to far!!
PS. Using the 'Burn' alone can help when creating uro's or sabamiki's.
Hope this helps?


 I particularly like the one that is described as the 'Sprawling' style by Kelley Bradley (though her 'Windswept' isn't that impressive!!!!) You can even go to the 'Ginkgo' of the potato world!!!


 This months site is 'inspired' by a request for help with bonsai related photography.